Millets
 |
(The Traditional Grains / Healthiest of grains / Priyangava / - दिल से देशी
श्रीधान्य मिलेट / कडधान्य ) |
2023 International Year of Millets
Super Foods
FROM FODDER TO FINESSE
Millets are the millennials must-haves. Grown since antiquity, millets have always been a staple diet of humans for more than 8000 years until modernization of cuisines took over the world of gastronomy by storm, making us get used to all that is refined and defined as tasty food.
Millets are a group of highly variable small-seeded grasses, widely grown around the world as cereal crops or grains for human food and as fodder. In India, millets have been mentioned in some of the oldest Yajurveda texts, identifying foxtail millet (priyangava), Barnyard millet (aanava) and black finger millet (Shyaamaka), thus indicating that millet consumption was very common, pre-dating to the Indian Bronze. In Sanskrit Priyangu is a creeper
In urban India, the lack of awareness about grains is so abysmal that most people don't know that grains other than rice and wheat, like barley, bajra, ragi, and jowar exist. While others think these cereals are only eaten to treat certain disorders. You should know the wealth of health benefit of eating different cereals / grains.
Millets are an important source of nutrients that can be added to your breakfast, dal-rice, or salads
Eating millets have many health benefits over eating rice and hence this poha made using millets is a great dish to include in your everyday diet. Millets have more protein and fibers than rice. Millets also have more vitamins and minerals as compared to rice. They are great for people with diabetes because of their low glycemic index (they are digested and absorbed slowly). This vegan and gluten-free recipe can be served for breakfast, snacks, or even a light lunch. It is great to pack for the school or work lunch boxes as well
There are some grains that are Extreamely rich in nutrition and great for the body but have been forgotten or sidelined today. Here's a list of grains that you must incorporate in your diet now.
Today almost 70% of all foods in north India are based on wheat and its derivatives. Over consumption of wheat can lead to disorders that range from mild gluten intolerance to obesity and lack of diabetic control.
One of the beat way to avoid gluten related issues is to avoid gluten containing foods like wheat in its many forms (biscuits, cakes, pastries, bakery items, rotis, parathas etc.
The gluten intolerance will find that even cereals like barley and oats (which could be cross contaminated with wheat in factories) are hard to digest. So here are the list of naturally gluten free foods.
"Diabetics should eat millets, as it controls the blood sugar due to low glycemic index."
5 MILLETS
JOWAR
BAJRA
RAGI
BARLEY
JAO CHOKHAR (Barley Bran in Hindi)
As 8 million people are suffering from diabetes in India,
GRAINS OF TRUTH
Introduction
Millets are small-seeded annual cereals grown for food, feed, forage, and fuel. About 20 different species of millet have been cultivated throughout the world at different points in time. Commonly cultivated millet species include proso millet (Panicum miliaceum L.), pearl millet (Pennisetum glaucum L.R. Br.), finger millet (Eleusine coracana), kodo millet (Paspalum setaceum), foxtail millet (Setaria italica L. Beauv.), little millet (Panicum sumatrense), and barnyard millet (Echinochloa utilis) (Rachie, 1975; Bouis, 2000; Wen et al., 2014). Millet ranks sixth among the world’s most important cereal grains, sustaining more than one-third of the world’s population (Verma and Patel, 2012; Changmei and Dorothy, 2014). Asian and African countries are the biggest millet producers (Table 1; Figure 1). Millets are a major source of energy and protein for millions of people in China, Japan, Africa, and India, and especially for people living in hot and dry areas of the world
One of the more common lifestyle issues that most people faced during the pandemic was inescapable weight gain.. It was the Pandemic again which introduced many to the pressing need for nutrition literacy and eating healthy. These hardy grains have come a long way, from bring an unacknowledged staple for over 130 countries. There reputation as a storehouse of nutrients proceeds them. Experts regularly advocate including them in your daily diet for a number of health benefits.
Gluten Free Millets are a gluten free cereal substitute that can be had for breakfast (dosas and cheelas) made with ragi finger millet), lunch (use foxtail millet for stir fried veggies with eggs) and dinner (kodon and barnyard millet are alternatives for khichadi and pulao, or use bajra for your rotis). Millets also make for great tiffin friendly meals-nachni or bajra porridge, barnyard millet upma or poha or beet root and millet wraps. Replace regular cookies with kuttu or amaranth leaves.
Weight loss High fiber contributes to weight loss. They are good source of soluble and insoluble fibre, thereby controlling appetite and increasing satiety. Not only a millets chock full of nutrients such as proteins, vitamins and fiber, but also pack minerals such as phosphorus, magnesium, copper and manganese.
Diabetes They help regulate blood sugar levels checked and delay the onset of diabetes.
Improve gut health They are also handy in reducing gastrointestinal inflammation. As a prebiotic, the soluble fiber in them promotes the development of healthy bacteria in your digestive tract. By giving stools more volume, insoluble fibre helps to regularize bowel movements and lower the risk of colon cancer.
By replacing calorie-dense grains with millets, it may be possible to reduce overall calorie intake which will further contribute to weight loss.
MINDFUL EATING
The unpretentious millets are finely getting the applause they deserve, right from hobnobbing with luxe dishes on five star menus to making a mark on global platform. This is no mean accomplishment! Once relegated to 'chara' (the fodder we serve to cattle), millets have been deservedly nicknamed 'desi superfood'. Owing to their super versatile nature, the mildly nutty and sweet grains can happily replace rice and wheat in recipes. Their subtle taste makes them an excellent flavor carrier for both savoury and sweet preparations. Add to this their climate resilience qualities and multiple health benefits, and you have an all rounder that has made the world sit up and take note.
"Healthy alternative to wheat"
RECLAIMING MILLETS
2023 is going to be a big year for millets. The United Nation has declared it as the International Year of Millets. One of the first crop to be cultivated in India, millets were consumed by the people of Indus or Harappan civilization. Jhangora (barnyard millet), ragi (finger millet), bajra (pearl millet), kangni (foxtail millet) have been a part of our diets since time immemorial and some of there find a mention in the Yajurveda texts. "While our ancestors believed in the power of millets, we sidelined it as primitive and rustic for a long time, such was our obsession with polished food."
"Millet is a food equivalent to yoga'. Millet can do to the world what yoga has done! They are a great source of protein, fiber, key vitamins and minerals. With a low glycemic index, they are ideal for diabetes and weight management. One can uninhibitedly ply around with their flavors and textures". Be it jowar, bajra or even smaller millets like samai, proso or kodo, all the varieties are nutritional toppers and bring in amazing diversity in our diet. The renewed interest in regional and hyperlocal cuisines, what we call 'forgotten foods' and an overall focus on well being has helped boost the popularity of millets.
This is an ongoing glossary of grains, both gluten-containing and gluten-free, in English and Hindi. Every cuisine has a staple source of carbohydrate. Today, the most commonly used grains are wheat and rice in different forms. In North Indian cuisine Indian breads made with wheat are staple, while in South India, rice, is the staple grain with curries and other dishes. Rice and wheat are popular in other cuisines too. For example, in South-East Asian cuisine rice is the staple gain, in North African cuisine couscous made with wheat is a staple, in Italy and many European countries much of pasta and pizza is made with wheat or rice and in Continental cuisine loaves of bread are usually made of wheat flour.
Wheat and rice may be amongst the most popular grains, but millets (such as pearl millet (bajra), foxtail millet (kangni), sorghum (jowar), finger millet (ragi), etc), are amongst the healthiest of grains available today.
Whole millets and millet flours are naturally gluten-free and a great alternative to rice and wheat in most recipes. With gluten sensitivity being on the rise, awareness about different types of millets as a healthier alternative increasing.
Since millets are known by their local names in most regions, I wanted to create a list of different types of millets in at least Hindi and English for reference. The most popular Indian millet is Pearl millet called Bajra in Hindi and the second most widely grown millet in India is foxtail millet, called Kangni or Kakum in Hindi. Other popular millets are Sorghum, called Jowar and Finger millet called Ragi or Nachni in Marathi.
With some variations, millets can easily replace wheat and rice in most recipes like stir-fry, flatbreads, pudding, pancakes, and even cookies!
Our millets include jowar (sorghum), ragi (finger millet), korra (foxtail millet), arke (kodo millet), sama (little millet), bajra (pearl millet), chena/barr (proso millet) and sanwa (barnyard millet). These might sound like hefty names but the benefits that your receive from these are in abundance
Dr Khader Vali – The millet man of India. Dr Khader Vali is known for his relentless efforts in the past 20 years in reviving five positive millets.
"Millet keeps all life style diseases at sway."
POSITIVE MILLET:
The first two categories of grains are called Millet, i.e. Positive and Neutral grain. Positive Millets are also called Sridhanya Millet. Positive gains contain dietary fiber, proteins, minerals, essential amino acids, medicinal values, healing qualities, and therapeutic benefit in abundance
RAGI
Black Finger millet रागी / Nachani or नाचणी / Madua / Mundua (मडुआ) / Mandika / Marwah / कोदा / केज़वारागु
.jpeg) |
Ragi
|
One of the staple foods for many villages across India, ragi is one of the more nutritious grains. Ragi looks like Sarson , but black in color. Slowly as villages start transforming into cities, people could eat only what was available there and many nutritious grains were soon forgotten. Ragi is very rich in calcium, and til today in the southern parts of India, it is used by mothers for preparing porridge for babies. It can also be made into roti or dalia with gur jaggery) for children.
.jpg)
This dark grain is slightly sweet and a rich source of calcium. The people of Karnataka make it into a porridge for children.
Instructions
Health benefits of Ragi
- This dark brown millet is very light and is good source of calcium. This makes it particularly osteopenia and osteoporosis which strikes particularly after menopause.
- Ragi is a good source of calcium for people who suffer from lactose intolerance. It can also be used while weaning small children.
- It is a great source of carbohydrates and dietary fibre that aids digestion and weight loss.
- Hundred grams of ragi contains 344 mg calcium, which works to support bone and teeth health. Ragi has 3 x calcium than a glass of milk.
- It is a low glycemic index food that assists in keeping blood sugar levels in check.
- Ragi is a gluten-free gain - perfect for people who are lactose or gluten intolerant.
- It is a rich source of vitamins, vitamin C and D in particular, and also iron.
- As it has lots of fiber, it is a boon for diabetic people.
- It also controls the cholesterol.
 |
| Baby Food Ragi Porridge |
- 2 TBSP ragi ground into flour
- 1 1/2 TBSP jaggery powder
- 1/2 cup filtered water
- 1 cup milk not for babies less than 1 year old.
Method- Boil the milk and keep it ready (making sure it doesn't curdle).
- Put the ragi flour into a saucepan.
- Mix together half of the water and the powdered jaggery. Boil in a separate pot or pan until it is completely melted.
- Then filter out the jaggery water using a strainer and add to the saucepan with the ragi flour.
- Add the rest of the water to the sauce pan and whisk everything slowly making sure that no lumps form.
- Cook the ragi flour mix on medium until the porridge turns dark brown in color and looks shiny. Stir it continuously while cooking otherwise porridge may stick to the pan.
- Stir in the cup of milk to the cooked ragi. (Skip this step if your baby is less than one year old).
- Boil the porridge until it thickens. Remove from the heat and allow it to cool down. (The porridge will become even thicker after cooling down.)
Precaution
- Always check with your pediatrician before introducing any new food.
- When you first introduce this porridge to your baby, increase the water quantity to 1 cup and make the porridge watery.
- Also, when you first start feeding your baby this porridge, try to avoid jaggery/ palm sugar/ palm jaggery or any kind of sweetener at least until they've reached one year old. Until then, you can add a small amount of sweet tasting, mashed fruits/vegetables like apples, banana, carrots, dates or raisins.
Soft gluten-free ragi chapati recipe
I always wanted to make a soft gluten-free Ragi Chapati. Since Ragi | finger millet does not contain gluten, it is very difficult to roll this into a roti. They tend to tear while making Rotis. The key thing is to cook the flour in hot water. By doing so, the dough becomes pliable and it helps to roll them easily. If you are looking for a gluten-free chapati, do try out this healthy Ragi chapati recipe.
Ingredients
- 1 cup ragi flour (flattened)
- 2 tbsp ragi flour for dusting
- 1 cup water
- ¼ tsp salt
- 1 tsp oil
- Few drops of ghee to smear on roti
- In a pan add 1 cup of water and add the salt and 1 tsp oil.
- Allow this to boil nicely.
- Simmer the flame and add the ragi flour to this.
- Mix well using a spoon.
- Switch off the flame.
- Cover and keep aside. Let this cool.
- Once it comes to a room temperature, transfer it to a bowl.
- Knead well into a dough.
- The water will be perfect, if needed, sprinkle 2 tbsp of hot water.
- Make lemon sized balls of the dough.
- Always cover and keep, to avoid drying.
- Take one dough ball and dust with dry ragi flour. You can use rice flour also for dusting.
- Roll into thin rotis.
- I used a sharp lid to cut the roti into perfect round shape. This helps in smooth edges and makes the chapati soft.
- Heat a tawa and once it is hot, place the ragi Chapati on it.
- Cook on both sides. Press it using a spatula.
- Smear a drop of ghee on both sides and cook.
- Once both sides are well cooked, take it out.
- Soft Ragi Chapatis are ready.
- Store this inside a hot box and cover it with a kitchen towel.
- The ragi chapati stays soft for 1 hour. But I highly recommend to eat this hot.
 |
| Ragi Laddoo |
Ingredients
- 2 cups ragi flour / finger millet flour
- 1 cup powdered sugar
- 6 tbsp ghee
- 2 tsp cardamom powder
- 12 cashews, finely chopped
- To a pan, add 2 tbsp ghee, chopped cashews and fry until they turn golden. Remove the cashews and set aside.
- Add the ragi flour to the ghee in the pan and sauté it for at about 8 – 10 minutes in a medium flame until you get the distinct aroma of ragi.
- Add powdered sugar to the mixture and keep cooking on low flame. Allow sugar to melt.
- Add another tbsp of ghee and mix well until you notice the mixture becomes a little wet and sufficient to hold into ladoo shape.
- Add cardamom powder and the roasted cashews. Mix well.
- Turn off the heat and allow it to cool down.
- Make into tight laddoo of the size you prefer. Store the ladoos in air tight container to last for a week.
Trivia
- Finger millet (ragi) is native to the Ethiopian and Ugandan highlands.
- Millet originated in Africa and had been cultivated in Southeast Asia for approximately 10,000 years. That’s an ancient food!
Health Benefits
- Ragi/Finger millets are filled with nutrients that you can call as energy boosters. It is a whole grain and is also gluten-free. It is one of the staple grain in South India. It is rich in fiber that helps with weight loss and to manage diabetes.
- Finger millets also packed with calcium, good carbs, amino acids, and Vitamin D.
- Cashews are one of the lowest-fiber nuts, and they are packed with vitamins, minerals, and antioxidants. These include vitamins E, K, and B6, along with minerals like copper, phosphorus, zinc, magnesium, iron, and selenium, all of which are important for maintaining good bodily function.
Ragi Ka Chila
Ingredients
Morning meals are the most interesting of all meals of the day. There's a vast variety of dishes that can be prepared for breakfast to suit individual preferences and tastes. . Chila is one such dish that in omnipresent in almost all Indian kitchens. It is light, nutritious and quick-to-make.. To bring in a variety to this nutritious meal, Ragi (or Finger Millet) is a hidden gem that is nutrient-rich and can be easily used to make Chila.
Ragi flour is made from dried and crushed whole grains that turns out to be a fine powder like soji or maida. Even though ragi is chock-full of important nutrients, somehow, it has not been really embraced as a preferred staple in Indian cuisine. It could be because of its coarse texture or dreary flavor. However, it does possess a unique earthy flavor, which helps in adding a distinct taste to your dish. And above all, it can benefit bodily health in ways more than one.
Method
Ragi Chila is made just like your regular Besan Chila by switching the flour. Make a batter of ragi and water. Add salt and cumin seeds, and mix well. Heat one tbsp of ghee or olive oil or any other oil of your choice, in a pan. Sprinkle some onions and green chilli. Pour one large tablespoon of the batter and spread it evenly. Cook from both sides and serve with mint chutney or achaar or tomato sauce.
You'll see that this ragi Chila is softer and good for digestion. In fact, its unique nutty taste will grow on you and this could eventually become a regular meal in your breakfast regime.
Ragi Murukku
 |
| Crispy ragi flour chakli. |
Ingredients (1 cup - 250ml)
- Finger millet flour / Ragi Flour – 1 cup
- Rice flour - 1/2 cup
- Besan flour - 1/4 cup
- Melted ghee or soft butter - 2 tbsp
- Red Chilli Powder - 1 tsp
- Cumin seeds or white sesame seeds - 1 tsp
- Asafetida / Hing - 1/4 tsp
- Salt and water - as needed
- Cooking oil - to deep fry
How to make the recipe
- Sieve the flours together.
- Add chilli powder, cumin seeds, salt, hing and ghee. Mix well.
- Add water gradually and make sticky, smooth dough.
- Cover with a wet cloth till use.
- Take star mould in murukku press. Fill the dough. Make shape in ladle.
- Deep fry the murukku in batches. Cook both sides till bubbles cease. Store after cool down .Enjoy !
Sieve ragi flour, rice flour and besan in a wide bowl.
Add red chilli powder, sesame seeds or cumin seeds, hing and salt. Add melted ghee and mix well till crumbly. You can also use soft butter at room temperature. Make sure ghee or butter is well spreaded in the flour.
Add water gradually and make soft, slightly sticky dough. Cover the dough with wet cloth till use. Take star mould in murukku press.
Fill the press with dough. Make shapes in back of ladle. If dough cuts or breaks while pressing, you should sprinkle little water in the dough, make it slightly sticky. Now you can make shapes perfectly. This murukku dough absorbs more water. So sprinkle water whenever needed and make shapes.
Heat oil to deep fry. Put a pinch of dough and if it rises to the top immediately, oil temperature is right. Now drop 2 to 3 murukku per batch. Fry both sides till bubbles cease completely. Keep the flame medium else murukku becomes black. Remove in a tissue paper and cool down. Store in a box and enjoy for months.
Precaution
- Add more chilli powder for spicy taste.
- Do not add more ghee or butter because murukku may disperse in oil while frying.
- This murukku dough absorbs more water. So sprinkle water in the dough whenever needed and keep it slightly sticky. This helps to draw shapes perfectly without breaking.
- Deep fry this murukku in medium flame till bubbles cease completely. If oil temperature is more, murukku becomes black and get burnt smell.
Ragi Uttapam
- 1 cup Ragi Flour
- 1/4 cup wheat flour for binding
- 1/4 cup Rice flour (optional)
- 1/2 tsf yeast and ferment the batter (optional)
- Salt
- Coriander leaves
- Spring onion,
- Carrot
- Green chili
- Cumin seeds
Instructions
- Take a mixing bowl and add ragi flour
- Ragi flour is a bit course, so you will not get good binding.
- And for crispy texture add rice flour
- Now add water in this. Add water gradually and make it a thin batter. Mix it well.
- If you leave this batter for 3-4 hours, than ragi will get soaked well. And you will get pancakes ot uttapam
- The batter will not rise and ferment like uttapam and idli. But when you stir you will feel it has become lighter and it is enough.
- Add all ingredients
- Cumin seeds gives nice flavor to the dish.
- Fresh grated coconut as coconut has good fats in it (optional) dry coconut can also be used.
- Take a non stick pan Apply oil over it. wipe it with tissue to spread the oil.
- Prepare a small size uttapam. Drizzle some oil on sides. Ghee or butter can be used.
- Cover with lid and let it cook on steam.
- Eat it with curd or dhania pudina or coconut chutney.
Ragi Papad
.jpeg) |
| Nachani Papad |
.jpeg) |
Ragi Idli
|
.jpeg) |
Ragi Puri
|
JOWAR
Sorghum Millet/ Shabart
.jpg) |
Jowar
|
Jowar is a rich source of vitamin B complex. Some varieties of jowar contain beta carotene which can be converted to Vitamin A by the body. It also has a small amount of vitamin D, E and K. Jowar can be eaten mixed in flour to make rotis. You can also eat it in the form of khichadi with other grains mixed with it. - Jowar is good for diabetics, as it controls the blood sugar.
- Jowar is another winter grain that is low in fat and is good source of carbohydrates.. It contains reasonably a good source of iron and calcium too. It makes the bones strong.
- It is recommended for those who suffer from Polycystic ovary Syndrome.
- It helps in the formation of urine, therefore can be given to hypertensive patients.
- It has lots of fiber and vitamin K which helps in clotting.
Jowar Roti / भाकरी , Bhakari
These jowar rotis are perfect to consume for those who are on a diet or people who want to control diabetes.
Now make soft and melt in mouth jowar rotis with our tips and tricks. These jowar rotis are perfect .
Jowar roti (or sorghum flour roti) is an Indian gluten-free flatbread. Many think that jowar flour rotis are very difficult to roll or it becomes hard after making. But if you will follow exact steps then you can make perfectly rolled jowar rotis that are smooth and soft.
Adding different flours to chapati dough is a great way to consume a variety of flours. it is very important to consume different millets, so you can either mix a variety of flours to your chapati dough or can even make millet rotis like jowar roti or bajra roti or farali roti. Farali roti is made by combining sama rice, sabudana, rajgira flour and singhare ka atta... Ingredients
- I/2 cup jowar flour / Sorghum flour
- 1/2 cup + 2 tablespoon water
- 1/2 teaspoonful oil
- Water to sprinkle while cooking
- Ghee to apply over rotis.
Instructions
- Sift jowar flour. Take flour in a bowl.
- Now add 1/3 cup water and mix. Initially add equal amount of water as flour.
- NOTE : The consistency of the mixture should be such that you should easily be able to mix with a spoon. Mixture should not be too stiff nor too watery. Quantity of water will vary according to the quality of jowar flour.
- We added 1 tablespoon more water. Mix well with a spoon and check the consistency. Press and level with the back of spoon or spatula.
- Now take water in a pressure cooker and put stand on it. Place vessel containing jowar flour +water mixture over it and cover. Close the lid of the cooker and remove whistle. Pressure cook on medium flame for 5 minutes. If you notice that the flour is not cooked well or mixture is too sticky or watery, then cook for 1-2 minutes more.
- Once done, remove the vessel and take out cooked mixture in a flat plate. Add ½ teaspoon oil and knead well for about 2-3 minutes or till dough becomes smooth and crack free. You need to knead the dough when it is warm or hot. If the dough becomes cold, it will be difficult to knead it.
- Now divide the dough in 3 equal parts and make smooth crack free balls.
- Flatten the ball slightly and dust it with jowar flour. Roll it in a circle.
- Heat tava on a medium flame. Place rolled jowar roti on hot tava and immediately sprinkle few drops of water on roti.
- Let it cook for about 30 seconds to 1 minute or till you notice bubbles. Flip it over and roti will puff up. Flip it. Then press lightly and take out on a plate. Immediately apply ghee over it.
- Repeat the process to make more jowar rotis.
- Serve these soft jowar rotis with baingan bharta and kadhi.
Try and get freshly ground jowar flour from nearby mill. Sometimes, readymade jowar flour is grainy. If the flour is too grainy, then you may even grind it once before using.Tips & Tricks
- For the flour + water mixture, initially add equal amount of water as flour. Mix well with a spoon and check the consistency. The consistency of the mixture should be such that you should easily be able to mix with a spoon. Mixture should not be too stiff nor too watery. Quantity of water will vary according to the quality of jowar flour.
- It is important to knead the dough when it is warm or hot. If the dough becomes cold, it will be difficult to knead it.
- 1/3 cup jowar flour yields 3 rotis. So 1 cup will yield 9 rotis.
Health benefit of jowar flour
- Jowar is a rich source of vitamin B complex.
- Jowar is a gluten-free whole grain, and so it’s a perfect alternative for people who have gluten intolerance.
- Its also a great choice for diabetic patients, since it digests slowly and hence leads to stable blood sugar levels.
- Its rich source of iron and protein and contains a good amount of fiber.
Nutrition
Calories 54 Kcal,
Carbohydrate 10g
Protein 1g
Fat 1g
Saturated Fat 1
Polyunsaturated fat 1 g
Monosaturated fat 1g
Trans fat 1 g
Sodium 1 g
Potassium 41g
Fiber 1g
Sugar 1g
Calcium 2g
Iron 1g
Ingredients
- 2 Tbsp Wheat Flour
- 2 Tbsp Sorghum Flour (Jowar)
- 2 Tbsp Chopped Fenugreek (Methi)
- 1/4 Tsp Turmeric Powder (Haldi)
- 1/8 Tsp Salt
- Ginger paste
- Ghee 1 tsp
- Oil 2 tsf
- Water As required
Instructions
- In a mixing bowl, take wheat flour, jowar flour, green chili, ginger paste, haldi, salt, chopped methi leaves, oil and mix well.
- Healthy Twist : Increase Omega 3 Boost immunity by adding, 1 tsp flax seeds
- Adding a little water, knead it into a soft dough
- Roll the dough into a ball, pat and flatten it to make a thepla and keep aside
- Heat a nonstick pan on a low flame place the raw thepla and roast it
- Allowing it to cook, flip, apply ghee and make sure both sides are browned well
- Serve hot with Baigan ka bhurta
Carrot Methi Jowar Theplas
Jowar Masala paratha
Ingredients
Instructions
- firstly, in a large bowl take 1½ cup jowar flour and ¾ cup wheat flour. you can also add ragi flour or besan.
- add 4 tbsp palak, 4 tbsp methi, 2 tbsp coriander, 1 carrot, and 1 tsp chilli powder.
- also add ½ tsp cumin powder, ½ tsp turmeric, ½ tsp garam masala and 2 tbsp sesame.
- further, add 1 potato, ¾ tsp salt, and mix well.
- now add ½ cup curd and combine well.
- add water as required and start to knead the dough.
- knead to a smooth and soft dough adding water as required.
- pinch a ball-sized dough and dust it with wheat flour and roll uniformly.
- further, roll to a slightly thick thickness like paratha.
- now on a hot tawa place the rolled paratha and cook for a minute.
- furthermore, when the base is partly cooked, flip the jowar paratha.
- also, spread ½ tsp ghee and cook both sides.
- finally, enjoy jowar paratha with raita and pickle.
Jowar Methi Murthiya
Jowar Methi Muthiya is one of the most popular and traditional steamed savoury snack recipes from Gujarat. Muthiya or muthia is a steamed dumpling prepared with different types of flour, spices and vegetables and either deep fried or shallow fried to give it texture. Muthiya is a perfect balance of spicy, tangy, and sweet flavours.
The term ‘muthiya’ has been derived from the word ‘muthi’ which means fist – the ‘gripping action’ of our hands, as in some Muthiya recipes, fist full of dough is taken to give it a distinctive shape. It is also called ‘velaniya’ or ‘vaataa,’. There are many variations of muthiya and it is gradually gaining popularity amongst the young generation as it is filling and super healthy as it is essentially steamed. Most versions of muthiyas is prepared with wheat flour or gram flour but in this recipe I have replaced it with white millet flour also known as Sorghum or Jowar to make it healthier.
Jowar /white millet flour/ sorghum is a great source of protein, iron, fibre. It is good for bone health, helps control blood sugar levels and is beneficial for diabetes and weight loss.
There are 2 ways of making Muthiya- deep fry or shallow fry. The deep fried muthiyas are traditionally prepared for curries like in ‘Undhiyo’ and shallow fried one are more popular as snack or light lunch/dinner.
Ingredients
- 1 cup white millet/Sorghum flour (jowar)
- 1 tablespoon finely chopped green chili
- 1 tablespoon finely chopped ginger
- 1 cup finely chopped fenugreek leaves (methi)
- 1 teaspoon cumin seeds
- ½ teaspoon turmeric powder
- 1 teaspoon red chili powder
- 1 teaspoon carom seeds
- Salt to taste
- 2 tablespoons yoghurt
- 2 tablespoons oil
- 2-3 tablespoons water
For Tempering
- 2 tablespoons oil
- 1 teaspoon mustard seeds
- 1 teaspoon sesame seeds
- 8-10 curry leaves
Method
- In a bowl combine together millet flour, jowar (bhakri flour), green chilies, ginger, fenugreek leaves, cumin seeds, turmeric powder, red chilli powder, carom seeds, salt, yogurt, oil and water.
- Use clean hands to squeeze the mixture to release the water from the vegetables. Keep squeezing and mixing until the mixture becomes dough-like in consistency. Gradually, add more water to form a soft and pliable dough. Start with a little water as the vegetables will release plenty as you mix. If the mixture doesn’t come together even after mixing, then you can sprinkle some more water to make the dough.
- Grease your hands with oil and make 13-14 small balls out of the dough. One by one, roll into 6-7 inches long logs (you may want to grease your hands with oil first). Place the rolled muthiya on the steam plate.
- Steam the muthiyas for about 15- 20 minutes on medium heat.
- To check if it is cooked – insert a toothpick or fork and it should come out clean. Allow it to cool for 10 minutes and cut them into small 1-inch pieces.
Tempering
- Heat oil in a pan and add the mustard seeds and sesame seeds. When the mustard seeds and sesame seeds splutter, add the curry leaves and steamed muthiya pieces and sauté on medium heat for about 5-6 minutes.
- Serve hot with green chutney.
Instructions Tips & Variations
- In this recipe, I have used bhakri flour which is a type of a coarse Whole wheat flour. If you do not have bhakri flour, then you can use your regular whole wheat flour and add 2 tablespoons fine semolina (सूजी).
- Do make the dough very soft as it will be hard to roll them into log shapes.
- While the final step is pan-frying, the muthiya can be eaten just after steaming as well.
- You can prepare the muthiyas and store them in airtight containers. Freeze them for about a month.
- If you do not have steamer at home, you can bake them for about 30-35 minutes at 160C/Fan140/Gas 3.
- Always wash the fenugreek leaves and drain off the excess water. This will help to remove the bitterness of the leaves.
- Fresh/frozen fenugreek leaves can be substituted with spinach and/or kale.
- If you want, you can add fruit salt while making dough as it makes them light and airy.
- You can add sugar to give slight sweetness to the muthiya.
Jowar Upma
Jowar Upma is a healthy breakfast recipe that will be different from the regular breakfast options. Made with millet flour, semolina and urad dal, this easy-to-make recipe is best served with sambar and coconut chutney. If you are bored of eating the same things for breakfast every morning, then you must try this off-beat yet healthy recipe. You can even savour this recipe for dinner if you wish to have something light and yummy. Made in the classic South Indian way, this Upma recipe will be a treat for your taste buds. Do try this recipe at home and serve it to your family with love!
Ingredients
- 1 cup black millet flour
- 1 teaspoon mustard seeds
- 1/4 teaspoon asafoetida
- 1/2 cup chopped onion
- 1/2 cup green pea split
- 2 tablespoon chopped coriander leaves
- 2 tablespoon lemon juice
- 2 teaspoon refined oil
- 1 teaspoon urad dal
- 6 curry leaves
- 1/2 cup semolina
- 2 teaspoon chilli garlic paste
- 4 pinches salt
- 2 cup water
Heat oil in a pan
- Take a deep sauce pan and heat the oil.
- Add ingredients for tadka
- Add the mustard seeds and urad dal. When the mustard seeds crackle, add the asafoetida and curry leaves and sauté on a medium flame.
- Add chopped onions
- Now, add the chopped onions and sauté for 1 minute.
- Add semolina and jowar flour
- Add the semolina and jowar flour and sauté for 2 more minutes.
- Add green peas
- Add the green peas, chilli garlic paste, coriander and salt. Mix well.
- Add water
- Add 2 cups of water, mix well and cook well till water is absorbed.
- Drizzle some lemon juice and serve
- Pour lemon juice, mix well and serve with sambhar or coconut chutney. Make sure you try this delicious recipe, rate it and let us know how it turned out to be.
- 3-in-1 Jowar Batter (make jowar idli, jowar dosa and jowar dhokla with just 1 batter)
- Hurda / Tender Jowar
With the beginning of December depicts the time for Jowar ears to be ready for plucking and this is also the time to snack on the unique dish Hurda. It is one of Maharashtra’s treasures of agriculture.
Hurda is commonly eaten just by roasting, which retains the majority of the nutrients. Tendor Jower is fiber and iron rich, with fairly high protein levels. It is said that Hurda is rich in anti-oxidants and all sorghum (hurda) varieties are gluten-free.
.jpeg) |
| Hurda Tender Jowar |
The Hurda parties are a great idea to bring people together to enjoy the mild sun in winter and eat nutritious hurda, roasted grains eaten with a chutney – sesame, groundnut, coconut or garlic; served on the side with jaggery.The tender jowar ears are available only for three months of the year and often eat these roasted over coal or a wood fire, sometimes with just salt and a wedge of lemon for the zest. The green jowar is juicy and slightly chewy, with fresh flavours in every bite.
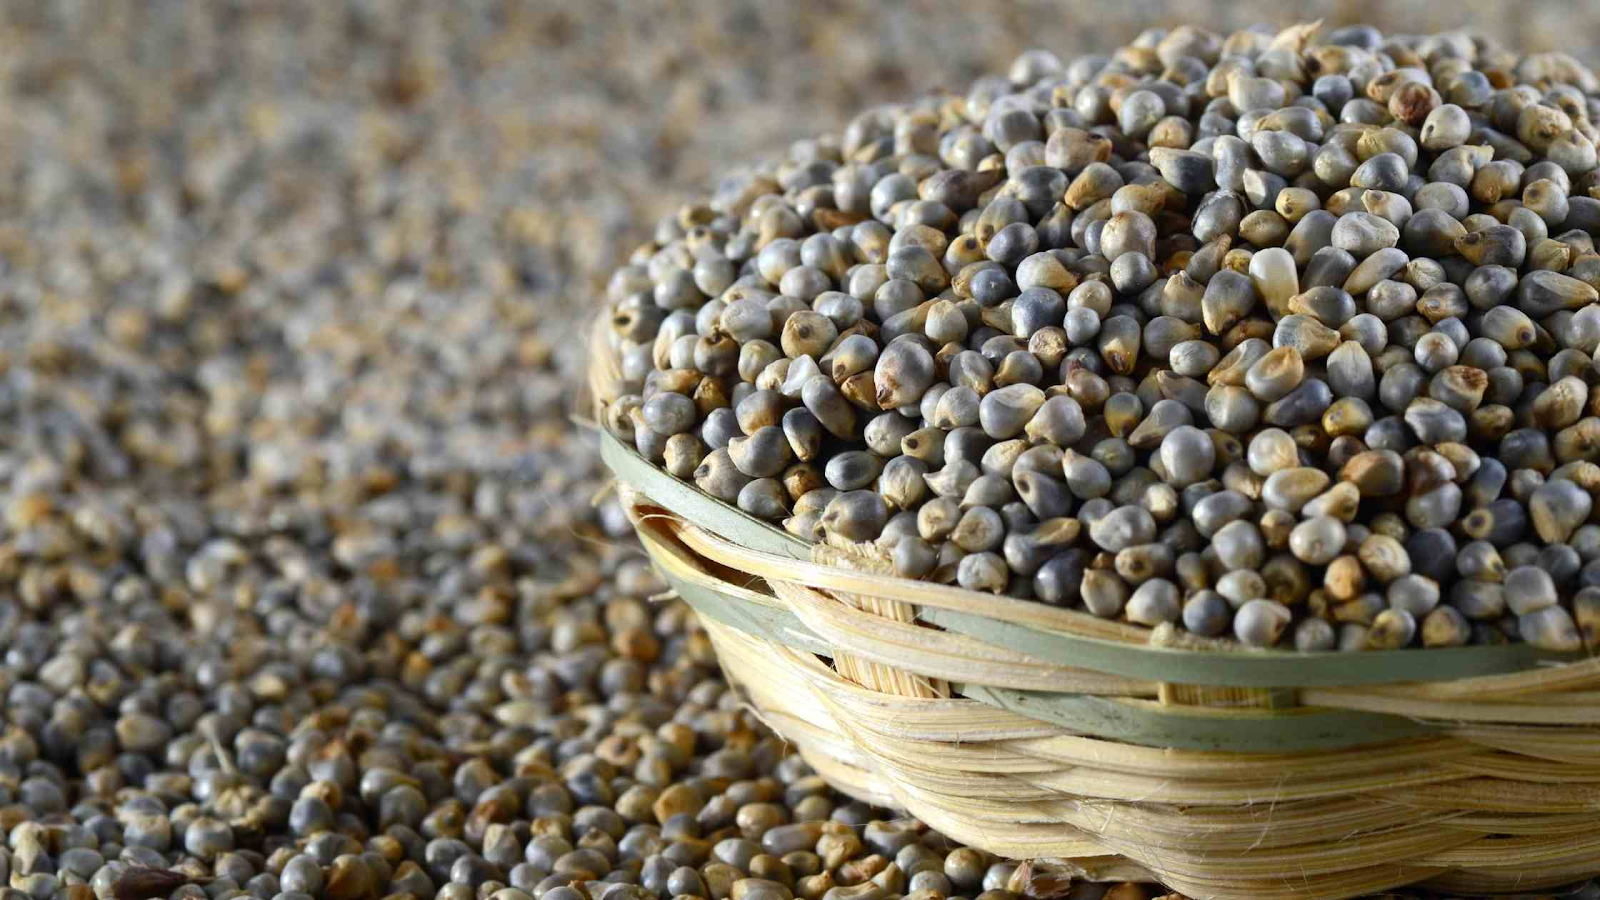
BAJRA
Pearl Millet
.jpeg) |
Bajra
|
.jpg)
An easily available millet. It is best eaten as bajra khichadi with mung dal and some organic ghee. This is a slightly rough grain and may only suit people who do not have active and aggressive symptoms of coeliac disease.
- Bajra is a 'warm' grain that is generally welcome in the winter. Bajra protein is relatively richer in lysine, methionine, tryptophan.
- It contains 5% of fat which is useful for those on a low fat diet, 400-500 grams of bajra will provide 20-30 grams fat and 10-15 grams linolenic acid.
- It is a reasonably good source of thiamine (vitamin B .It is also a good source of iron and calcium.
- It is considered to be good for people who cannot eat wheat. But it should be combined with other grains so as to not create an imbalance of doshas inside the body.
- Due to low glycemic index , it prevents diabetes.
Bajra Roti
A healthy traditional north Indian roti recipe made with bajra flour or pearl miller flour. it is particularly made in Rajasthani cuisine and typically served with dry curries or sabzi for lunch and dinner. it is generally popular at the dry or hot climate demographics because it is considered to cool down the body and provide necessary supplements.
To roll the rotis, i. e with rolling pin and via tapping it by hand. beginners can find it difficult with bare hands and i recommend to adopt rolling pin. secondly, the roti’s has to be thick as compared to normal wheat based roti or chapati. if you roll it thin, it may start to have cracks and disintegrate. lastly, you may add finely chopped veggies like onions or leafy veggies like coriander, pudina and dill leaves to roti dough to make it more flavoured.
Ingredients- 2 cup bajra atta / pearl millet flour / sajje hittu
- Salt to taste
- Hot water to kneed
- Wheat flour for dusting.
Instructions
- firstly, in a large mixing bowl take 2 cup bajra atta, ½ tsp salt and mix well.
- Add ½ of hot water and start to knead.
- Knead to the soft dough for at least 10 minutes.
- Add water as required and knead well as there is no gluten in the dough.
- Pinch a small ball sized dough and knead again.
- Dust with wheat flour and pat gently. you can alternatively use a rolling pin to roll as done for paratha.
- Pat with both the hands until the roti turns as thin as possible. if the roti breaks, it means it needs more kneading.
- Dust off excess flour and put over hot tawa.
- Now spread water over the roti with help of hand or wet cloth removing excess dough.
- Wait until the water evaporates then flip it to the other side.
- Press gently and cook all the sides.
- Finally, serve bajra roti / sajje rotti with jaggery or curry.
Tips
- Firstly, make sure to use fresh bajra flour else it will break while preparing.
- Also, make sure to knead the dough well else there will be cracks while patting rotti.
- Most noteworthy, if there are cracks forming while patting roti, take some hot water and knead the dough further.
- Finally, bajra roti / sajje rotti recipe taste great when patted with hands rather than prepared with rolling pin.
Rajasthani Bajra Khichadi
Rajasthani Bajra Khichdi (Bajre Ki Khichdi, Pearl Millet Porridge, Bajre Ka Khich) is a delicious savory porridge made using bajra (pearl millet), rice, and yellow moong lentil.
Bajra is a great grain to include in your everyday meals, as it is rich in Magnesium which promotes heart health. It also has potassium and fiber, which are essential nutrients required for our body.
This bajre ki khichdi is very nutritious, easy to make, and popularly made in the winter season.
The only time-consuming part to make this Bajra Khichdi is to remove the husk from the Bajra. In earlier days, this process was done by crushing the bajra grains in a large mortar and pestle. Now, with the easy accessibility of mixers and grinders, this step has also become quick and easy.
- ½ cup whole bajra grains
- 1/2 cup yellow moong dal (split and skinned yellow moong lentil), C
- 1/2 cup white rice (rinsed and drained).
- 1 tablespoons ghee (replace with oil for vegan)
- ¼ teaspoon asafetida (hing) (skip for gluten-free)
- ½ teaspoon cumin seeds
- 1 teaspoon grated ginger
- teaspoons chopped green chilies
- 2 teaspoons salt (or to taste)
- 4 cups water)
Instructions
Prepare The Bajra
- These days, bajra grains come with the husk already removed, so even if you skip this process, it’s Ok. I do it just to be on the safer side.
- Add bajra to a bowl and rinse well with water. Drain well.
- Transfer it to a mixer grinder jar and pulse it to make a coarse powder.
- Do not over-grind. We are doing this process to remove the husk of the bajra.
- Transfer the bajra powder to a bowl and cover it with water.
- Wait for 10-12 seconds. The husk will start to float on top of the water. Gently drain the water along with the husk and repeat this process 2-3 times to get rid of all the husk from the bajra
- Heat 1 tablespoon of ghee in a 3-liter pressure cooker over medium-high heat.
- Once the ghee is hot, add ¼ teaspoon asafetida, ½ teaspoon cumin seeds, 1 teaspoon grated ginger, and 2 teaspoon chopped green chilies and sauté for 10-12 seconds.
- Add the cleaned bajra to the cooker along with ½ cup of rinsed yellow moong dal, ¼ cup rinsed white rice, 2 teaspoon salt, and 4 cups of water. Mix everything well.
- Close the lid of the cooker.
Pressure cook the khichdi for one whistle on high heat. Now reduce the heat to low and cook for 15 minutes.
Remove the cooker from heat and let the pressure release naturally.
Once the pressure is released, open the lid and mix the khichdi nicely using a wooden spoon, wooden whisk, or wire whisk.
Add some more water if the khichdi looks thick and cook for a minute. Transfer the hot khichdi to serving plates and serve hot. Check for salt and add more if needed.
How to make bajra khichdi using a pre-mix?These days, bajra khichdi pre-mix is available in many places.
In this mix, the husk of the bajra is already removed and it is then mixed with rice and lentils.
If it’s available where you live, you can use it too.
Just measure out 1 and ¼ cups of this premix in place of bajra, dal, and rice and keep the rest of the recipe the same.
Bajra Kasuri Missi Roti
- 1/2 cup Bajra flour
- 3/4th cup besan
- 1/4th cup wheat flour
- Green chili
- Ginger
- Kasuri methi
- 1 tsp Ajwain
- 1/2 tsf cumin seeds
- 1 tbs[ coriander seeds
- Salt to taste
- Red chili powder
- 1/2 tsf turmeric
- 2 tbsp dried fenugreek leaves
- 1 Onion
- 1/2 Tbsp chopped green onion (optional)
- Green coriander
- Water as required
- Ghee
Instructions
- Green chili, ginger 1/2 inch paste + Salt
- Mesh it in mortal & pestle.
- Take Bajra flour + Besan +wheat flour
- Crush the ajwain with hand and mix it
- Jeera
- 1 tbs[ coriander seeds coarsely meshed
- Salt
- Red chili powder
- Turmeric
- fenugreek leaves crush with the hand
- 1 Onion chopped
- Paste of green chili and ginger
- Chop green coriander
- Kneed the dough with normal temperature water
- Slowly add water, mix it
- Add little ghee in it
- Massage the dough
- Cover the dough with wet cloth for 15 minutes to set
- Heat the tava
- Kneed the dough again
- Dust the wheat flour , prepare dough balls
- This roti is made thick
- Cook the roti over tava with desi ghee
- Eat with white butter
- Serve hot with lentils and vegetables.
Bajra Masala Puri
Ingredients
- Pearl Millets Flour (Bajra Flour) - 1 Cup (150 grams)
- Potato - 3, boiled (200 grams)
- Salt - 1/2 tsp
- Cumin Seeds - 1/2 tsp
- Carom Seeds (Ajwain) - 1/2 tsp
- Turmeric Powder - 1/4 tsp
- Sesame Seeds - 1 tsp
- Green Chilli - 2, finely chopped
- Chilli Flakes - 1/2 tsp
- Ginger - 1 tsp, grated
- Coriander Leaves - 2-3 tbsp
- Oil for Frying
Instructions
- Take 3-boiled potatoes and grate them using a fine grater. Once done, add grated potatoes to 1 cup bajra flour.
Add 1/2 tsp of salt, 1/2 tsp of cumin seeds, 1/2 tsp of carom seeds (after crushing), 1/4 tsp of turmeric powder, 1 tsp of sesame seeds, 2-finely chopped chilis, 1/2 tsp of chili flakes, 1 tsp of grated ginger, 2-3 tsp of coriander leaves to the Bajra flour and mix well.
Add water gradually and prepare a soft dough. Knead the dough for 2-3 minutes. Cover the dough and keep aside for 15 minutes to set.
[After 15 minutes] The dough is ready. Apply little oil to your hands and knead the dough for a few minutes. Break the dough into small balls and grease the rolling board and pin.
Take a dough ball, apply a little oil, and roll it into a slightly thick poori. Heat the oil in the Kadai/wok for frying. The oil should be medium-high hot and keep the flame medium.
Carefully lift and slide the poori in the oil. Once it comes up to the surface, press it down lightly with a spatula. Turn the poori to the other side when fried from below. Fry the poori till golden brown from both sides. Roll and fry all the pooris similarly.
Bajra Masala poori is ready to be served. It is crispy and crunchy in texture. Serve it with aloo masala, aloo tomato, aloo matar, or any sabzi of your liking. Serve it together with chutney and everybody will love it.
Bajra Chila
Bajra na chamchamia in Gujrat Because they spoon it over tava while making chilas.
.jpeg)
Ingredients
- 1 cup Pearl Millet Flour ( Bajra)
- 1 tbsp Ginger Garlic Green Chillies Paste
- 1 tsp Carom Seeds (untoasted)
- 1 tbsp Red Chilli Powder
- 1 tbsp Sesame Seeds (untoasted)
- 1/2 cup Dahi
- 1/4 cup Coriander Seeds (untoasted)
- 1/8 pinch Baking Soda
- 1 tsp Salt
Instructions
- Chop fresh Methi leaves
- Green garlic
- Add 1/2 cup water / or butter milk/ curd
- Heat a tava on high flame
- Add vegetable oil
- Make tiny Chilas on tava
- Sprinkle some sesame seeds over it
- Apply oil over Chilas
- Flip the Chila very carefully
- Bajra chilas are cooked on both the sides
Bajra Dalia
Ingredients
- 1/2 cup bajra
- 1/2 cup moong dal
- 1/2 cup rice
- 1 chopped onion
- 1 chopped tomato
- 1 chopped carrot
- 1/2 cup chopped spinach
- 1/2 tsf Red chili powder
- 1/2 tsf paper
- 1/2 tsf turmeric powder
- Salt as per the taste
- Dalia
Instructions
- Take a fine Bajra, moong dal and rice and pressure cook them with a bit of salt. Than take this out in a kadhai, and cook till it starts boiling.
- Til than, in a seperate pan add ghee, jeera and hing.
- To this add onions and carrot, tomatoes and spinach.
- Add dry masala chili powder, turmeric powder, paper and salt.
- Once the vegetables are cooked pour them into a dalia mixture and combine.
Methi Bajra Paratha
(Diabetic Diet) Gluten free. It has a biscuit texture which makes it enjoyable.
If you have diabetes, you would find a new surge of diabetic-friendly foods in the fresh winter produce. Methi (fenugreek leaves) is one of the many winter vegetables that come replete with many health benefits. Methi is especially beneficial for diabetes diet
Ingredients
- 1/2 cup Bajra
- 1/2 cup Besan
- 1/2 tsf cumin seeds
- Salt to taste
- 1/2 tsf red chili flake
- Turmeric
- Asofoetida
- 1 tbsp of sesame seeds
- 1 tbsp of oil
- 1/2 cup of fenugreek leaves
- 2 tbsp of oil to cook the paratha
Instructions
Making a dough- Take bajra flour, Besan, turmeric, chilly flake, salt, sesame seeds, cumin seeds, hing, oil and fenugreek leaves.
- Mix them together well
- Add warm water slowly
- Dough should be made ready just before you are ready to make paratha. Keed the dough between your palms.
- Greece your palm .Roll the paratha with light hand about 6 inch in diameter
- Cook the parathas over tava with the help of oil.
- Serve hot, they have a biscuit texture.
- Paratha can be rolled in between plastic.
Pair this methi bajra paratha with curd, raita, chutney or pickle of your choice, and make your winter mornings a happy one.
Bajra Dosa
Ingredients- 1 cup pearl millet
- 1/2 cup rice
- 1/2 cup urad dal
- Salt to taste
- oil
Instructions
- Soak urad dal in container and rice and bajra together in a seperate container. Let both the mixtures soak in water for at least 4 hour.
- Grind urad dal to make smooth paste. Than grind bajra and rice together.
- Make dal paste and bajra rice mixture together. Add some salt and water to make smooth batter. Let the batter ferment for 4-5 hours or overnight.
- Greece hot pan with some oil wipe it off and than sprinkle some water to make dosa with the batter as usual.
Bajre Ka Thepla
Ingredients- 1/2 cup atta
- 2 Tbsp oil
- 1 Tbsp dried methi
- 2 tsp salt
- 2 tsp ginger
- Green chilies - make paste with salt, ginger and garlic.
- 1 tsp garlic
- 2 tsp coriander powder
- 1 tsp sugar
- Yogurt to knead
Instructions
- Kneed with yogurt to make soft dough
- Roll down theplas with the help of roller
- Now heat a non stick tava and place thepla over it.
- Cook from both sides until crisp
- Serve with aachar or curd and enjoy.
Bajra Paniyaram / Or Bajra Appam
Ingredients
- Pearl millet flour 11/2 cup
- Semolina (Suji) 1/2 cup
- Salt to taste
- Yogurt 1/2 cup
- Water
- Onion 1 diced
- Carrot 1 grated
- Green peas 1/2 cup boiled and coarsely crushed
- Green chili 1 chopped
- Fruit salt 2 tsf
Instructions
- Take pearl Millet flour in a mixing bowl
- Add suji salt and yogurt to it. Add water to this mix.
- Make a thick batter with these ingredients
- Keep aside a batter for 20 minutes
- Dice the onion into fine pieces and grate the carrot
- Boil some green peas and coarsely crush them in a blender
- Add the crushed green peas to the millet flour batter
- Add chopped coriander, green chilies, onion and carrot into batter
- Add salt to taste and mix the ingredients into the batter with water
- Set this aside for 5-10 minutes
- Add fruit salt to the batter and mix
- Take an idli or Paniyaram or Appam pan. Oil its pockets.
- Pour the batter into its pockets. Cook on a medium flame for 5-6 minutes
- Turn the Paniyaram balls and cook for 2-3 minutes.
Hordeum vulgare / Jau /Jav /
 |
| Green Unripe Barley |
 |
| Natural barley seeds |
 |
| Barley flour with husk, its magnesium and Protein controls blood sugar |

This ancient herb manages most of the stress caused by urban living. Barley grass shoots are are store house of vitamin B, B2 and C, folic acid, pantothenic acid, calcium and iron. Infect the calcium content in barley grass is far more than milk, and its vitamin C content is far more than oranges. This makes barley grass an excellent addition to the diet of menopausal woman and sports people.
Barley's nutrients help in healing several problems caused by air pollution., water pollution, pesticides in food, fast foods and stress. Combined, these issues lead to the rise of dangerous free radicals in the body, which might cause diabetes, ageing, high cholesterol and heart disease. However, barley is not gluten-free.
Not too many people eat it as much as they should. It is available as coarse barley (original form), hulled barley (barley pearls) and barley sattu (mixture of ground pulses and cereals). Barley has more fibers than oats, both soluble and insoluble. It is also rich in antioxidants. Barley is excellent to tackle diabetes because it has very low glycemic index. It is also high in protein, making it a nourishing food for children.
Barley, a member of the grass family, is a major cereal grain grown in temperate climates globally. It was one of the first cultivated grains, particularly in Eurasia as early as 10,000 years ago
It is considered to be one of the world’s healthiest foods and is also extremely versatile to use. Barley is also called “Jau” in Hindi, “Jav” in Gujarati, “Satu” in Marathi, “Barliarisi” in Tamil and “BarliBiyyam” in Telugu. There are many Barley water benefits for health (Jau benefits) which include aiding in constipation, curing infections and even preventing Cancers.
Barley products : barley flour, barley grits to barley flakes.
- Skin & Hair : The minerals and enzymes in barLey grass help heal skin and hair, and make them stronger.
- Patients with liver issues : Barley grass powder or juice is an excellent source of aminO acids. This is useful for people who have liver problems and hence cannot digest animal proteins. Being easy to absorb, its also a good source of protein for vegetarians.
- Patients with ulcer sand digestive disorders : Many digestive disorders like stomach ulcers and Crohn's disease, which are caused due to stress, improve when barley grass juice is added to the diet of the patients.
- Patients with tumors : A combination of wheat grass and barley grass is recommended due to its powerful antioxidant and cell repairing properties. Tumors thrive in an acidic medium, but slow down when the body becomes alkaline. The same property pf barley grass and wheat grass slows down the ageing process.
- Diabetic patients : Barley grass juice mixed with a vegetable juice can be an excellent tonic for diabetes. It has beta Glaucon which controls blood sugar and cholesterol.
- Heart patients : Barley grass reduce cholesterol This works best when combined with a plant based diet that is free from trans fat.
- Barley. is one of the most alkaline grains, is also rich source of soluble fiber.
- It helps decrease blood cholesterol.
- It helps improve blood glucose in non-insulin dependent diabetes mellitus.
- Barley is good source of magnesium and antioxidants. It contains an alkaloid that acts as a diuretic and is therefore good for hypertensive people and those who have water retention problems.
- Since barley suppresses lactation, Lactating mothers should avoid it. But it can be given to dyslipidemia, diabetes and to those who want to lose weight but suffer from irritable bowel syndrome.
Barley Water
You can have around 2-3 glasses of Barley water per day if you do not have any Gluten allergies. This dosage is especially recommended for patients who face urinary tract infections. Barley water can flush out the toxins and the bacteria, offering instant relief. The only problem with consuming excess Barley water is, it’s diuretic properties that can give you the urge to frequently urinate.
The milky white drink which is made by boiling barley seeds in water is called Barley Water, which is the most common form of consuming this Barley. Barley water in Hindi is called “Jau Paani” and is used as a traditional home remedy in many households and is well-known for its nutritional benefits. The goodness of Barley water is such that, it is often given as the first baby food in many countries. It is quite easy to digest and also helps in treating many ailments. Here’s your guide to understanding the best benefits of drinking Barley water and also learn the preparation method.
Barley water is safe for daily consumption. In fact, it is quite recommended for pregnant and lactating women and even old people to keep constipation and other digestive problems at bay! Drinking Barley water regularly during summers can result in a cooling effect.
Ingredients
Pearl barley – ¼ cup.Water – 3 cups.Crystal salt – to taste [Those who want a sweet version can add sugar, brown sugar, molasses, jaggery, or honey.]Lemon juice – 1 tbsp.Instructions
Soak thoroughly cleaned barely in 3 cups of water overnight.Pressure cook in the same water for about 4 whistles. Lower the flame and allow to cook for another 10 minutes until Barley turns mushy.Take out the cooked barley after the pressure subsides.Allow the mixture to cool thoroughly before straining and flavoring.Serve the refreshing drink garnished with a lemon wedge.Barley water benefitsBarley Water For Weight Loss / Anti Cancerous Properties / Barley Water For Diabetes/ Protection For The Heart/ For A Stronger Digestive System: it an ideal home remedy for constipation / Barley Water Is Good For Your Kidneys/ Natural Remedy For Anemia/ For A Better Immune System / Shields Against Gallstones/ Averts Atherosclerosis/ For Stronger Bones/ Treats Urinary Tract Infections / Natural Antidote For Poisoning.
Health benefit of Barley - Barley is good for tackling Diabetes, as it has low glycemic index, and is a nourishing food for children.
Broken Barley Upma
 |
| Barley Grit or Dalia |
- 1/2 cup Barley (seeds) , (Broken Barley) Dalia
- 1-1/2 Cups Water
- 1 Onion , finely chopped
- 1 teaspoon Ginger , grated
- 2 Green Chillies , finely chopped
- 1/2 cup Carrot (Gajjar) , diced small
- 1/2 cup Green beans (French Beans) , finely chopped
- 1/4 cup Green peas (Matar) , steamed
- 1 Tomato , chopped
- 2 tablespoon Raw Peanuts (Moongphali)
- 1 teaspoon Mustard seeds (Rai/ Kadugu)
- 1 tablespoon White Urad Dal (Split)
- 1 sprig Curry leaves , roughly chopped
- Salt , to taste
- 2 teaspoons Lemon juice
- Coriander (Dhania) Leaves , small bunch, chopped
- Oil , for cooking
Instructions
To make the Broken Barley Upma Recipe, heat the oil in a pressure cooker or a pan on medium heat, add the mustard seeds and allow it to crackle. Once it crackles add in the split urad dal and peanuts. Saute for a few minutes until the dal gets roasted.
Once roasted add chopped onions, ginger, green chilies, curry leaves and sauté till onion turns translucent.
Add carrots, beans, peas and let it all cook for a minute or two stirring in between.
Now add barley grits mix well and sauté for few minutes. Keep stirring else barley may stick to the cookers /pan's bottom.
Pour in the 1 cup of water. Stir in the salt and tomatoes and give the mixture a good stir.
Barley Idli
- 1 cup Idli Rice
- 1 cup Urad Dal
- ½ tsp Methi Seeds, Fenugreek Seeds
- Salt to taste
- Water For soaking, grinding as required
- 2 tbsp Sesame oil (approx. qty) for greasing the idli plates
- 2 cups Pearl Barley
Instructions
- Wash and rinse the ingredients couple of times until the water is clear. Drain all the water, soak well until the ingredients are fully submerged for atleast 4 hours.
- In another bowl, measure and add whole urad dal along with methi seeds.
- Soak them for atleast 4 hours.
- After 4 hours, Drain all the soaked water, rinse and add the urad dal in the mixer grinder jar.
Grind the urad dal into a smooth paste using some water. The consistency should be thick so use ice cubes instead of water in case the mixer grinder jar heats up. In case you are using wet grinder, this is not an issue.
Once Urad dal is ground, add the soaked and drained barley and rice. Grind it to a smooth paste using water.
Mix both the batters using your hands. It provides some warmth and aids in good fermentation.
Cover and Ferment the batter for atleast 8 hours. Once its fermented, add salt, mix gently and either make idlis immediately or store the batter in the refrigerator for use later.
Prepare the steamer, grease the idli plates with oil and pour a ladle of the batter. Steam the idli for 10 to 12 minutes. Allow it to cool slightly before demolding.
Serve the Barley Idli with accompaniments of your choice.
Barley Dosa
- Barley 1/2 cup
- Kodo millet (varagu) or Idli rice 1/2 cup
- Urad dal 1/4 cup
- Poha | aval 1 tblsp
- Oil to make dosa
Instructions
- In a wide bowl add barley, millet (can use little millet or barnyard millet too) or idli rice, urad dal and aval.
- Wash and soak them in water for 4-5 hours.
- You can keep it overnight too.
- Drain the water and grind into a smooth paste.
- I used mixie jar for this, if the quantity is more you can use grinder too.
- Transfer this to a bowl and add salt.
- Mix well with hands and keep it aside for 5-6 hours.
- Generally millet batter will ferment so fast than the usual batter.
- Add little water to adjust the consistency.
- Mix well
- Heat a dosa pan.
- Pour a ladle of dosa batter and spread on the tawa.
- Drizzle little oil on the top.
- Once it is cooked on one side, flip to the next side.
- Cook for few seconds and take it out from the pan.
- Repeat this for the rest of the batter.
- Crispy dosa is ready to serve.
- Serve with any chutney of your choice.
- We had with Onion chutney.
Vegetable Barley Soup
- Pearled barley
- Frozen peas
- Onion
- Garlic
- Carrots
- Celery
- Potato
- Tomato paste
- Broth
- Olive oil
- Thyme, bay leaves, oregano
- Salt & pepper
Instructions
- Saute’ carrots, onion, celery in olive oil for about 5-7 minutes
- Add garlic and herb and stir until fragrant, about 1 minute
- Stir in barley, tomato paste, and the potato cubes
- Add broth, cover and cook for about 20-25 minutes
- Stir in frozen peas
- Cook for a further 5 minutes
- Taste and adjust the seasoning
- Remove bay leaves and thyme sprigs
- Serve with a drizzle of olive oil and grated cheese if you like
- Doesn’t it look delicious? Enjoy 🙂
Masala Barley
Masala Barley
Here's how you can make the healthy barley even better by adding a touch of masalas to it. Healthy bhi aur tasty also, go give it a try! MASALA BARLEY
Ingredients
- 1 cup barley, soaked for 30 minutes and drained
Salt to taste
- Salt to taste
- 2 tbsp oil
- 1 tsp mustard seeds
- 1 tsp cumin seeds
- 8-10 curry leaves
- 1 tbsp garlic, finely chopped
- 1 inch ginger, finely chopped
- 2-3 green chilies, chopped
- 1 medium onion, chopped
- 1 small carrot, chopped
- 1 medium tomato, chopped
- 1 small capsicum, chopped
- ½ tsp cumin powder
.jpg)
.jpg)


.jpeg)

.jpg)


.jpeg)
.jpg)

.jpeg)

.jpg)

.jpg)
.jpeg)
.jpeg)
.jpeg)

.jpg)

.webp)


.jpg)

.jpeg)
.jpg)
.jpeg)

.jpeg)

.jpeg)


.jpg)
.jpg)

.jpg)
.jpg)
.jpg)
.jpg)


.jpeg)
